21, Aug 2023
Christmas Deer Drawing 2024: A Step-by-Step Guide To Create A Festive Masterpiece
Christmas Deer Drawing 2024: A Step-by-Step Guide to Create a Festive Masterpiece
Related Articles: Christmas Deer Drawing 2024: A Step-by-Step Guide to Create a Festive Masterpiece
- Christmas Coloring Pictures For Kids 2024: A Festive And Educational Activity
- Christmas Carols Karaoke CDs 2024: The Ultimate Guide To Festive Sing-Alongs
- Christmas Day Lunch Near Me Deals 2024: Festive Feasts And Family Gatherings
- Christmas Carols To Play In 2024: A Festive Playlist
- Christmas Day 2024 Weather Forecast: A Comprehensive Outlook
Introduction
With great pleasure, we will explore the intriguing topic related to Christmas Deer Drawing 2024: A Step-by-Step Guide to Create a Festive Masterpiece. Let’s weave interesting information and offer fresh perspectives to the readers.
Table of Content
Video about Christmas Deer Drawing 2024: A Step-by-Step Guide to Create a Festive Masterpiece
Christmas Deer Drawing 2024: A Step-by-Step Guide to Create a Festive Masterpiece
As the festive season approaches, the air fills with a sense of joy and anticipation. One of the most iconic symbols of Christmas is the reindeer, a majestic creature that has captured the imagination of people worldwide. In this comprehensive guide, we will embark on a step-by-step journey to create a captivating Christmas deer drawing that will bring the spirit of the season to life.
Materials:
- Pencil
- Eraser
- Drawing paper
- Colored pencils or markers
Step 1: Sketch the Outline
Begin by sketching the basic outline of the deer’s body. Draw a small circle for the head, an oval for the body, and four lines for the legs. Ensure that the lines are light and free-flowing, as they will serve as the foundation for the more detailed drawing.
Step 2: Define the Head
Refine the head by adding details. Draw two large eyes with a dot in the center for the pupils. Above the eyes, sketch two small eyebrows. Add a nose by drawing a small triangle and a mouth by drawing a curved line. Define the ears by drawing two pointed shapes on top of the head.
Step 3: Draw the Antlers
The antlers are a distinctive feature of a deer. Draw two curved lines extending from the top of the head. Add branches to the antlers by drawing smaller lines branching out from the main curves. Give the antlers a textured look by adding short, uneven lines along their length.
Step 4: Shape the Body
Connect the head to the body by drawing a curved line for the neck. Define the body by adding a hump on the back and a slight curve for the belly. Draw four legs extending from the body, each with a small hoof at the end.
Step 5: Add Details to the Legs
Enhance the legs by adding joints and muscles. Draw small circles for the knees and ankles and connect them with lines to create the bones. Add short, curved lines along the legs to suggest muscle definition.
Step 6: Draw the Tail
Add a fluffy tail to the deer by drawing a small, triangular shape extending from the body. Give the tail a flowing look by adding a few curved lines to suggest movement.
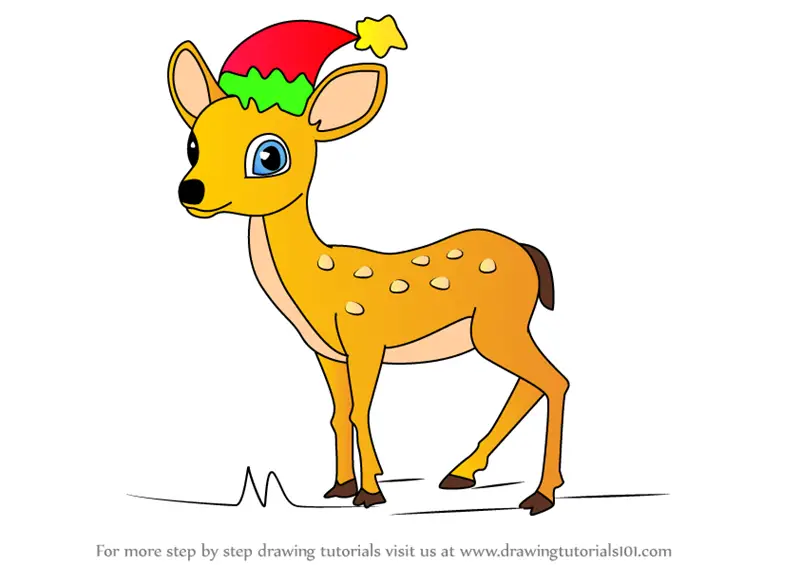
Step 7: Add Christmas Elements
To make the drawing festive, incorporate Christmas elements. Draw a Santa hat on the deer’s head by adding a curved line for the brim and a pom-pom on top. Add a scarf around the deer’s neck by drawing a long, flowing line.
Step 8: Color the Drawing
Bring the drawing to life by adding color. Use brown or gray for the deer’s body, black for the antlers, and red for the Santa hat and scarf. You can also add a touch of glitter or metallic paint to the antlers for a festive shimmer.
Step 9: Add Shading and Highlights
To create depth and dimension, add shading and highlights to the drawing. Use a darker shade of brown or gray to shade areas such as the underside of the body and the inner parts of the legs. Add highlights using a lighter shade of brown or gray to the areas exposed to light, such as the top of the head and the back.
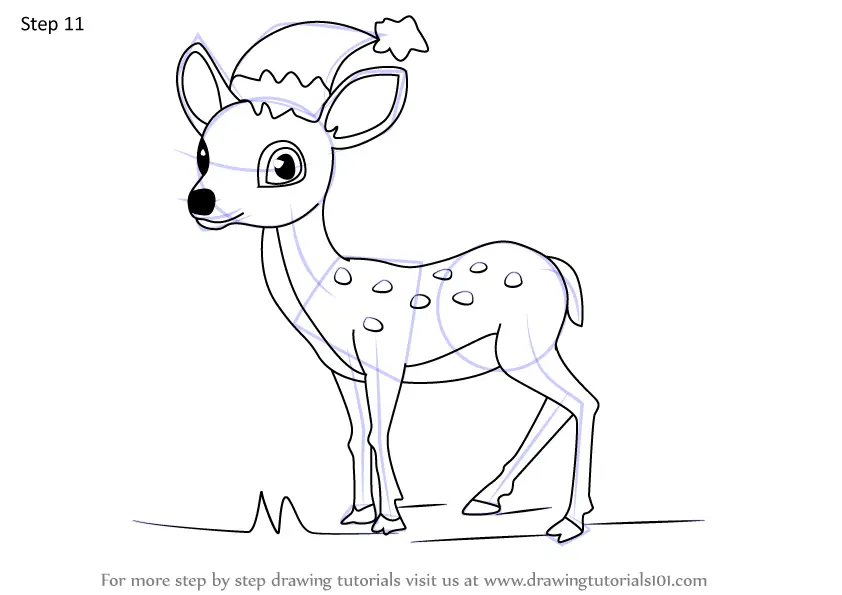
Step 10: Final Touches
Complete the drawing by adding any final touches. You can draw a background with a wintery scene, such as snow-covered trees or falling snowflakes. Alternatively, you can leave the background blank to focus on the deer’s festive attire.
Conclusion
Congratulations! You have now created a captivating Christmas deer drawing that captures the spirit of the season. This festive masterpiece will bring joy and cheer to your home or office, reminding you of the magic and wonder of Christmas. Whether you display it on a wall, frame it as a gift, or use it as a holiday card, this drawing will spread the joy of the season to all who see it.


Closure
Thus, we hope this article has provided valuable insights into Christmas Deer Drawing 2024: A Step-by-Step Guide to Create a Festive Masterpiece. We appreciate your attention to our article. See you in our next article!
- 0
- By admin